Installing Handle on NextJS websites
The NextJS based website is a single page web framework and it enables you to create full-stack Web applications by extending the latest React features. But it doesn’t offer you the standard index.html where you can easily copy & paste most of the <script> based install codes, which also includes the default Handle Chatbot install code. We should do some small customization to the install code to fit the NextJS structure.
There are two places in a NextJS application that we can install the <script>...</script> They are located in the _app.js and layout.js.
The app.js file is a top-level component that wraps around all of your pages, and any code placed inside this component will be executed on every page. To add scripts, we can also use built-in Next.js component Script. Placing your Script components inside app.js ensures the scripts are loaded and executed across all application pages.
Layout.js is a custom component you create to make your pages look the same in terms of design (e.g., headers, footers, or sidebars).
In short, _app.js is a special component in Next.js that sets up your app’s pages, while Layout.js is a custom component you create to make your pages look consistent.
The Script component in Next.js provides a strategy prop that you can use to define where the script should be loaded. There are three possible values for the strategy prop:
beforeInteractive: This will load the script before rendering the page. This strategy is not recommended for scripts that can be deferred, as it may slow down the page rendering. The script will be placed in the <head>.
lazyOnload: This will load the script once the page has been rendered and the window.onload event has been fired. This strategy is recommended for non-critical scripts that can be deferred. The script will be placed in the <body>.
afterInteractive (default): This will load the script immediately after rendering the page. The script will be placed in the <body>.
More information about NextJS Script compontent: https://nextjs.org/docs/api-reference/next/script
In this tutorial, we will show you how to put Handle Chatbot in the _app.js.
Step 1: Find your _app.js file
The _app.js file usually locates in the Pages folder as one of the first files.
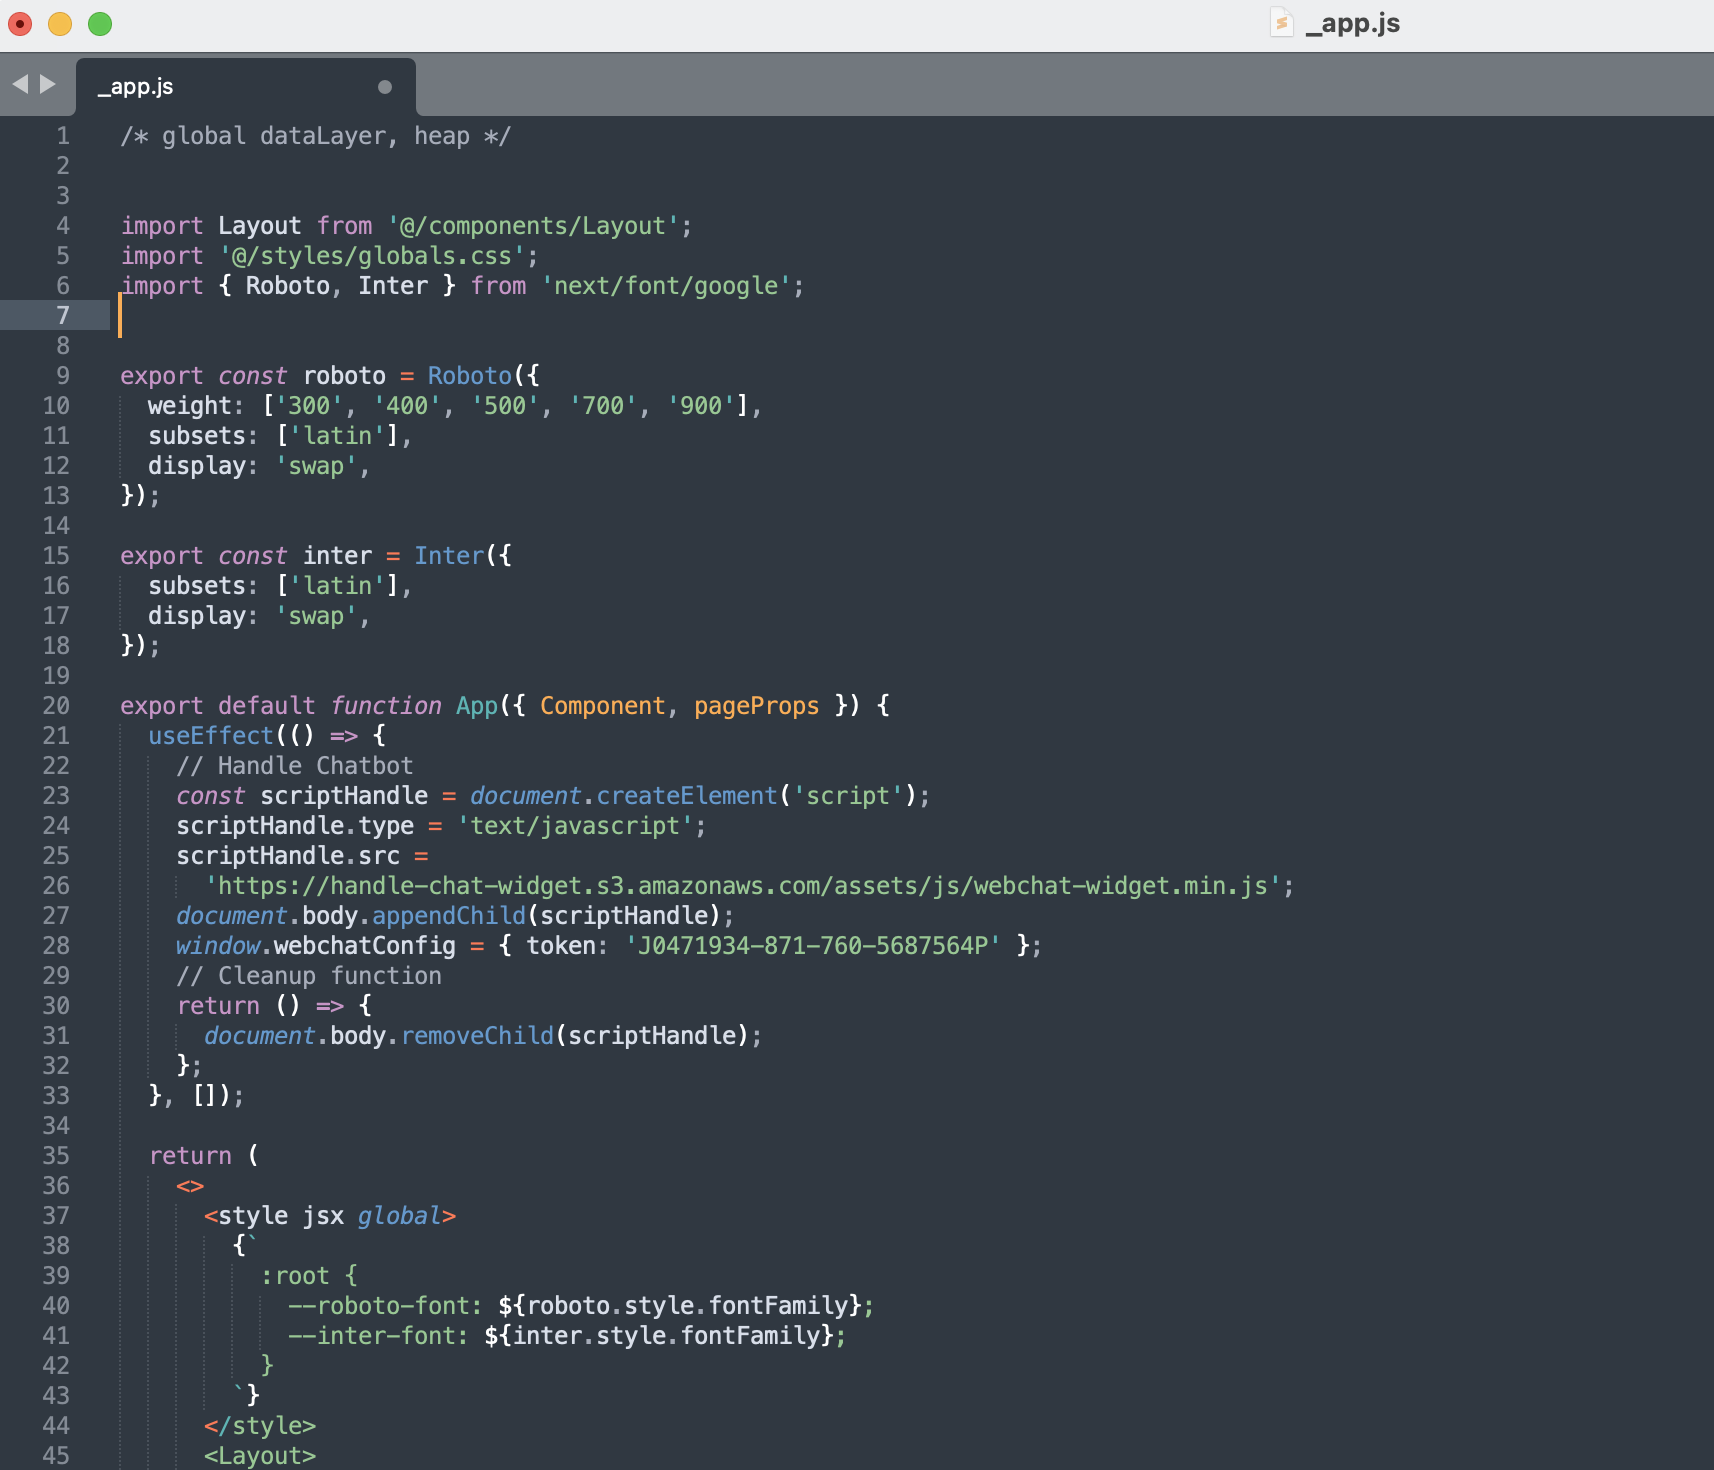
Step 2: Open the app.js in a text editor
You should see the code look like what’s shown in the image below.
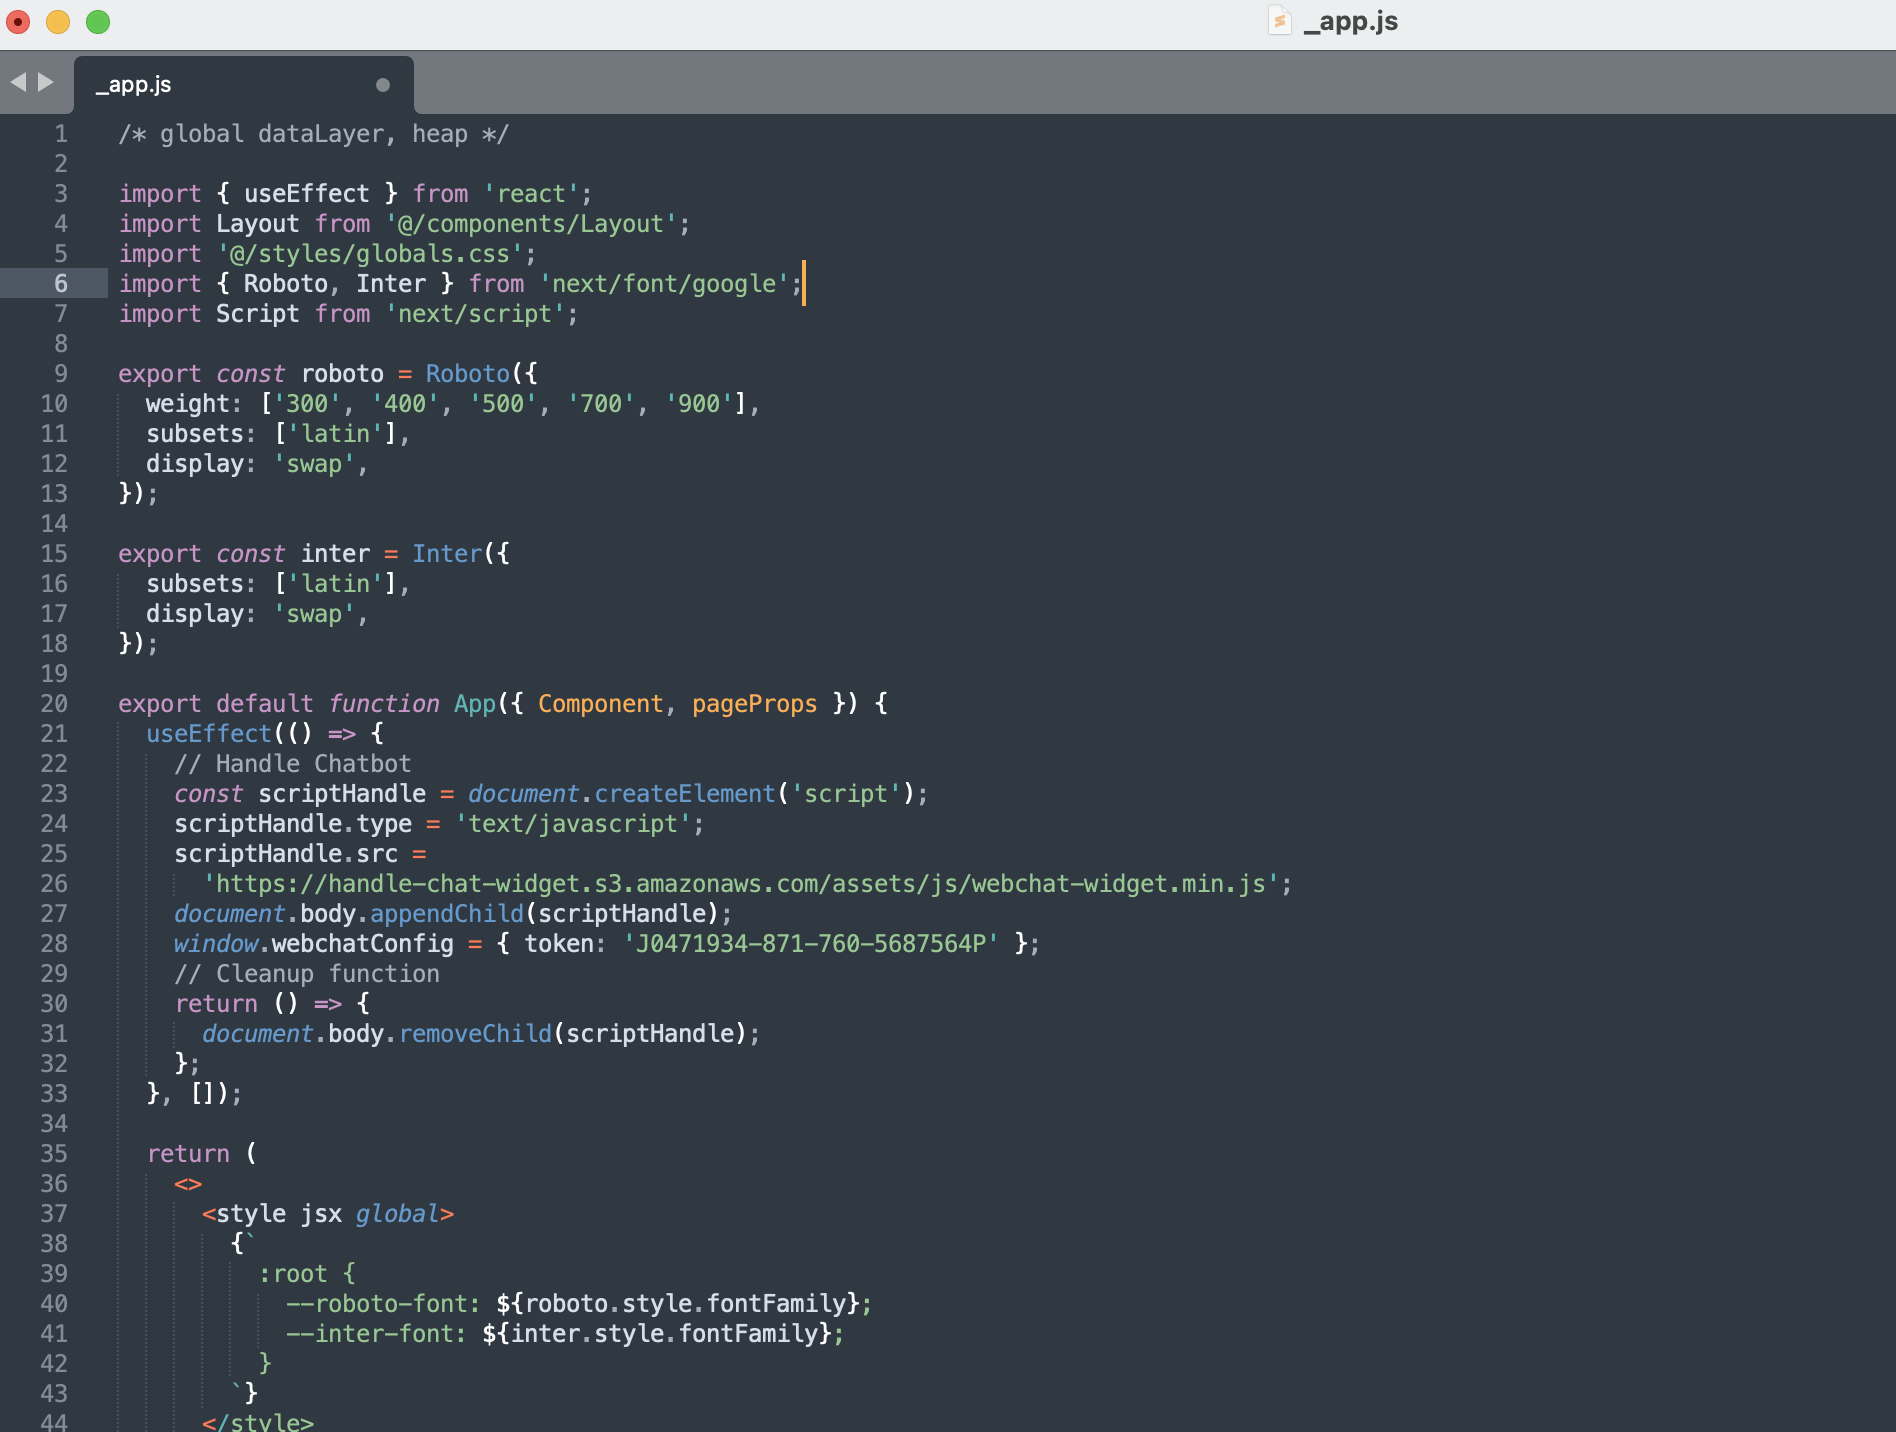
Step 3: Add the two lines below on top of the app.js
Add these two lines on top of the app.js to import the necessary NextJS system functions.
import { useEffect } from 'react';
import Script from 'next/script';
Step 4: Add the Handle Chatbot install code
You can copy and past the code below to your app.js and make sure you use your own token to replace the example token shown in the code below. You own token can be found in the default Handle Chatbot install code.
The default Handle Chatbot install code is located in Handle dasbhoard => Installation Please visit: https://dashboard.askhandle.com/widgets/
// Handle Chatbot

const scriptHandle = document.createElement('script');

scriptHandle.type = 'text/javascript';

scriptHandle.src = 'https://handle-chat-widget.s3.amazonaws.com/assets/js/webchat-widget.min.js';

document.body.appendChild(scriptHandle);

window.webchatConfig = { token: 'J0471934-871-760-5687874P' };

// Cleanup function

return () => {
	document.body.removeChild(scriptHandle);
};
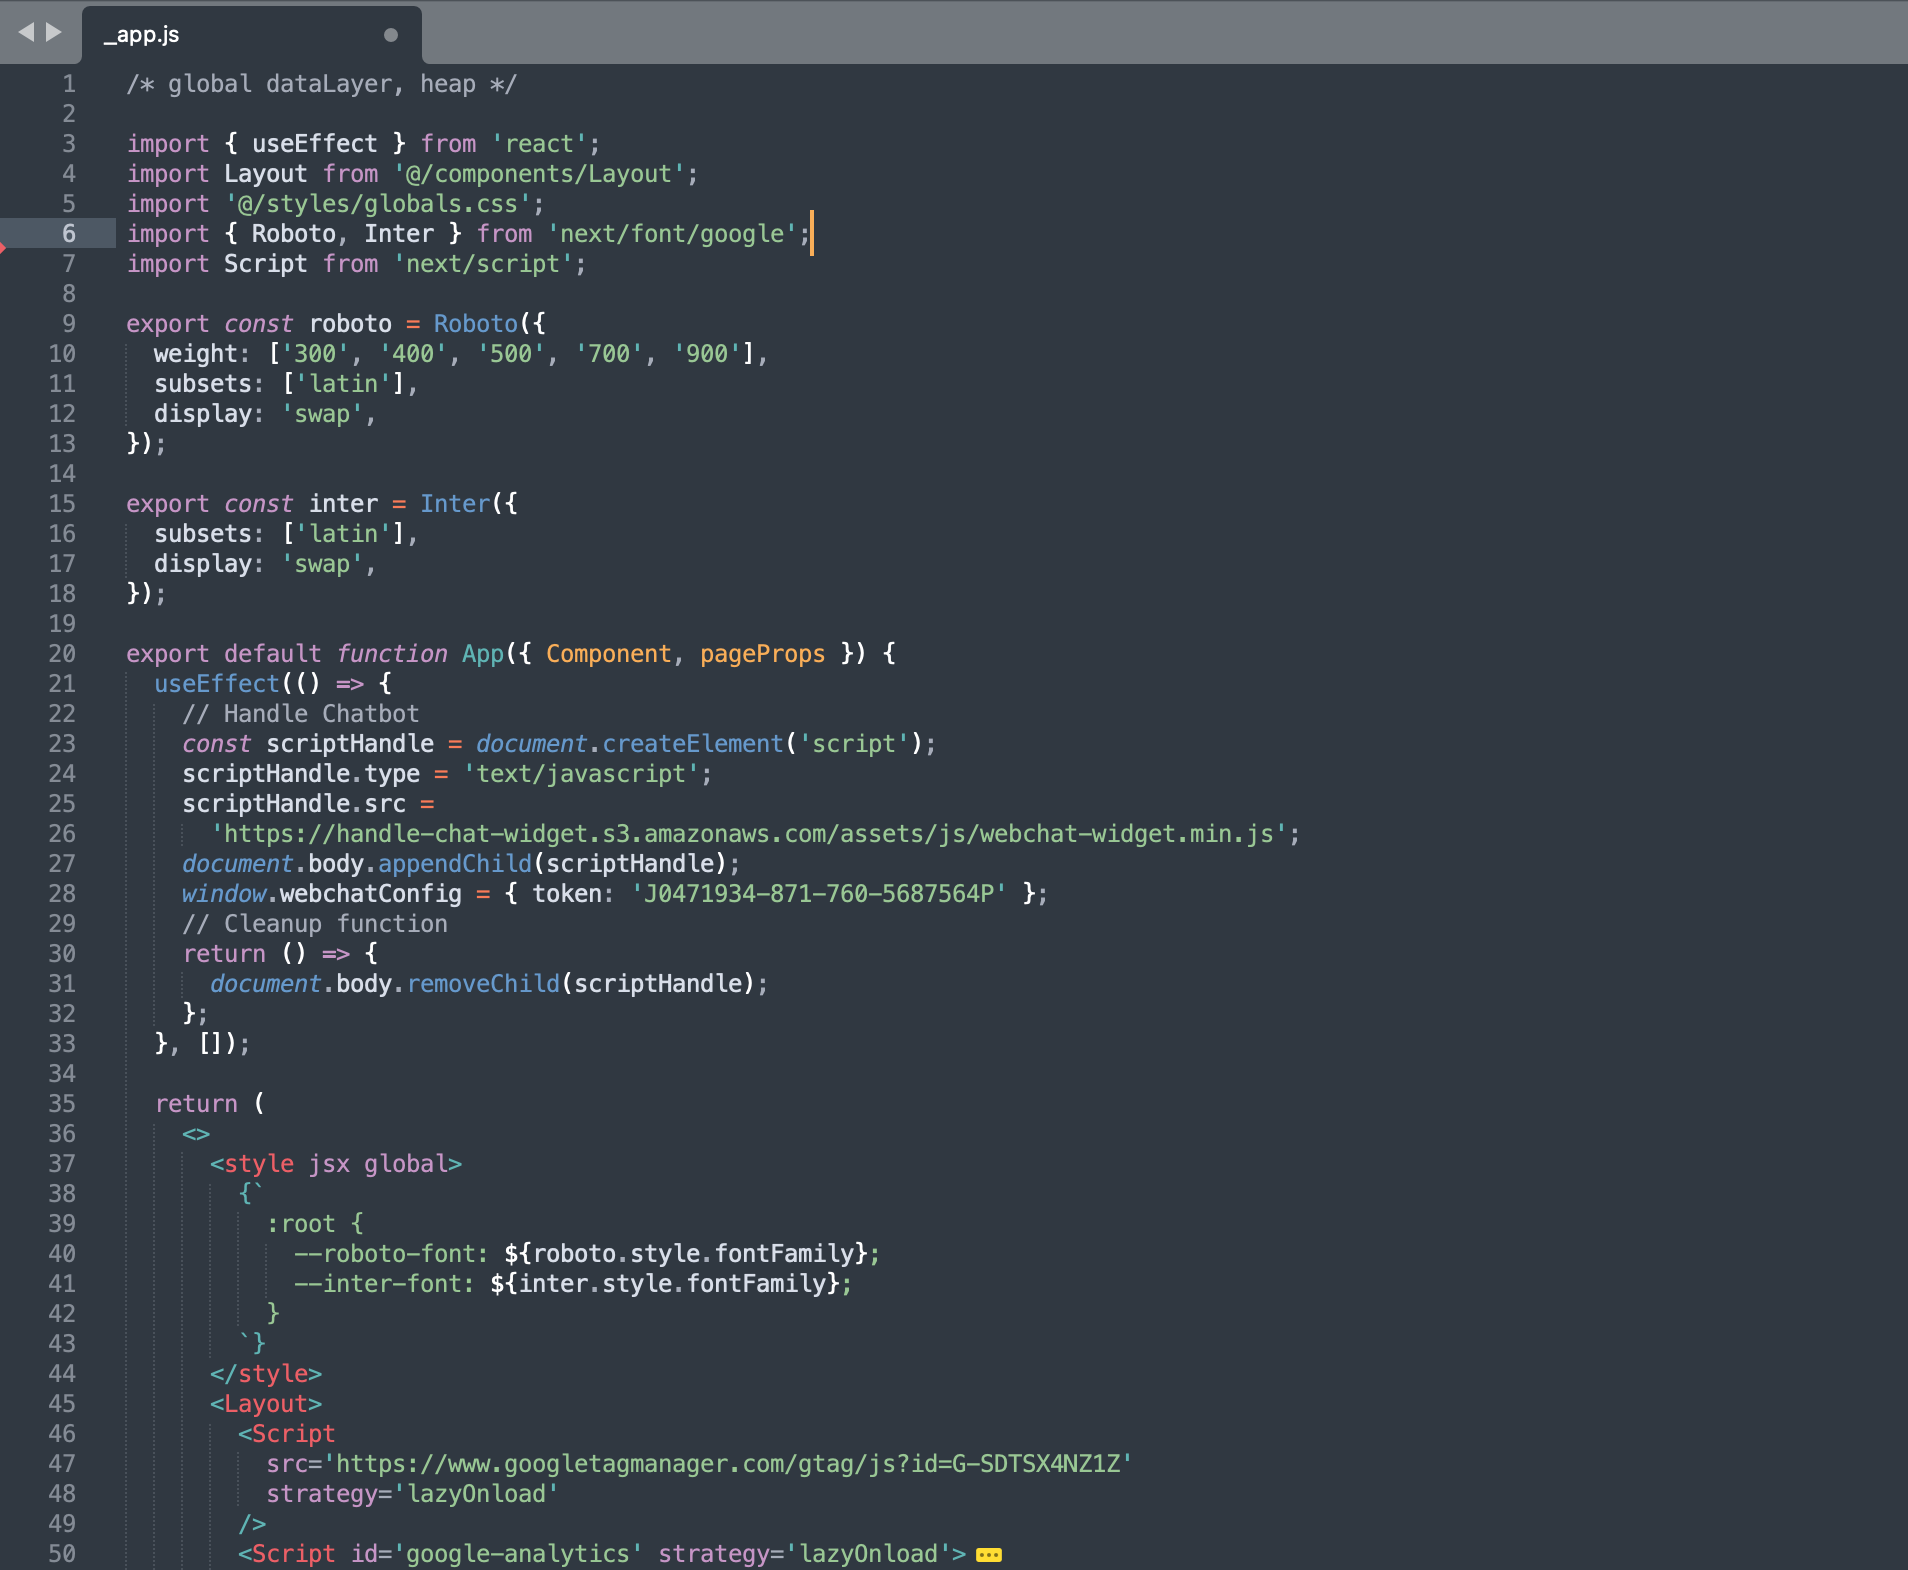
The code will looke like the image below after you add them:
Step 5: Save the file and close the text editor
Save all the changes and close the text editor. Now you will see the Handle widget on the right side of your website.