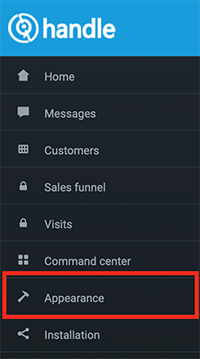
Appearance
In this part, you will be able to configure visual and textual parts of the Handle chat box. Let’s look at the parts you can configure and how you can configure them.
Option 1: Change greeting message
Log in to Handle dashboard and go to “Appearance” section, Option 1.
This is a message that users will see as soon as the chatbot starts.
The default message is “Hi [username]! How can we help you today?”.
To change the message, you can write your message in the “greeting message” field. After you are done changing the greeting message, click the “Save” button on the bottom of page to save the change.

Option 2: Change contact message
This is a message you will use to guide users to contact you on your phone number or email address. The default message is For more details, please call us directly..
To change the default message, simply start writing in the message field. When you are done with your message, please click the “Save” button at the bottom of the page to save the changes.

Option 3: Logo configuration on the chat box
This is the part where you can upload your company logo, or any other image, which will be shown as soon as the user engages with Handle.
The default logo is Handle logo. To change the logo, simply click on the area where logo is placed and upload your own logo/image.
Recommended size is 170 x 170 pixels
When you finish uploading your logo, don’t forget to click on the “Save” button at the bottom of the page to save the change.
![]()
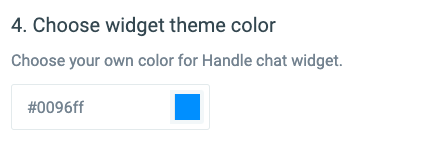
Option 4: Configure the chat box theme color
This is the part where you can configure the theme color for the chat box, so it can match your website/brand color.
To change the color, you can copy and paste the Hex color code (for example, #0096ff) or simply choose the color from the color chart. After you finish configuring the color, click the “Save” button at the bottom of the page to save the change.
Option 5: Change positioning of the chat box
You can choose several positions on the website where to place the Handle chat box. The default position is the right-bottom part of the website.
There are two parts in configuration of the chat box position: horizontal and vertical part:
-
On the horizontal part, you can choose from
right,centerandleftplacement; -
On the vertical part, you can choose from
bottom,centerandtopplacement;
When you finish configuring the positioning of the chat box, please don’t forget to click the “Save” button at the bottom of the page to save the changes.

Option 6: Configuring user contact inputs
This is the part where you can enable/disable user inputs, which you can receive before users engage with the chatbot. The user inputs include the name, email address and phone number. This information, when received, will be automatically added to user leads.
By default, enabled user inputs are: Name and Email Address.
To enable/disable certain input, simply switch on or off the toggle by the input (blue color means the input is on; white color means the input is off).
After you configured the inputs, please click the “Save” button at the bottom of the page to save the changes.

Option 7: Setting up the header title and subtitle
Header Title and Subtitle are the messages welcoming users to chat. The default Title is We are currently and Subtitle is Online, as it can be seen below.
To change the Title and Subtitle, simply start typing in each field. When you are done, please click on the “Save” button at the bottom of the page to save the changes.

Option 8: Changing the chat title and subtitle
Chat Title and Subtitle are the taglines above the chat. The default Chat Title is Need help? and Subtitle is You can ask us anything!, as seen below.
To change the Chat Title and Subtitle, start typing in the fields. When you finish customizing your Chat Title and Subtitle, please click the “Save” button on the bottom of the page to save the changes.

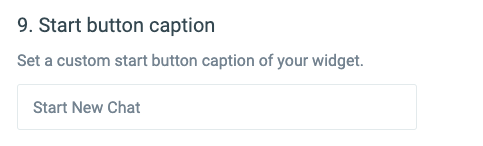
Option 9: Change the name of the start button
Start Button is the button that starts the chat between users and the chatbot. The default name of the Start Button is “Start New Chat” (as seen below).
To change the name of the Start Button, please start typing in the field and after you made the changes, click the “Save” button at the bottom of the page to save the change.
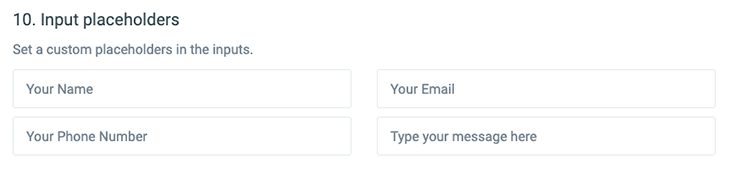
Option 10: Changing the names of placeholders
Placeholders are fields where users input information (name, email address, phone number, messages).
Default placeholders can be seen in the image below.
If you would like to change any of these placeholders, please start typing in the field of the placeholder you would like to change. When you finish changing the placeholder names, please don’t forget to click the “Save” button at the bottom of the page to save the changes.
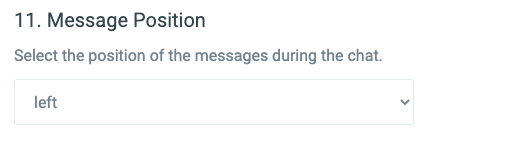
Option 11: Changing the message position
This is an option to show the chatbot avatar on the left side or the right side in the chat. Default position is the left side, as seen below.
If you’d like to change the position of the chatbot avatar, please click on the field that shows “left” and choose the ‘right’ option.
After you are done changing the position, please click on the “Save” button at the bottom of the page to save the change.
Option 12: Changing the chatbot avatar
Avatar is a visual representation of the chatbot. It’s an icon/image next to the messages.
The default chatbot avatar can be seen in the image below.
To change the default avatar, simply click on the avatar and upload your own avatar/image that you would like to use. After you changed the chatbot avatar, please click the “Save” button at the bottom of the page to save the change.
![]()
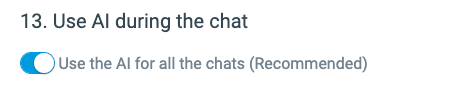
Option 13: Turning the chatbot on/off
You have an option to completely turn off the chatbot (in this case, Handle would serve as a live-chat platform).
The default setting is of course “On”, as seen below.
If you’d like to turn the chatbot off and use Handle as a live-chat platform, simply click on the “Use chatbot” button (if the button is white, the chatbot is turned off).
After you made the change, please click on the “Save” button at the bottom of the page to save the change.
Option 14: Setting-up the auto pop up
Auto pop-up is the ability for the chat box to pop up to engage with users on the website.
The default setting is 7 seconds (7 seconds after the users came to the website, the chatbot will pop up).
To change the auto pop-up time, simply click on the “Auto pop up” field and put the number of seconds that needs to pass for the chatbot to pop up (if you don’t want the chatbot to pop-up, put zero).
After you changed the setting, please click on the “Save” button at the bottom of the page to save this change.

Option 15: Sound notification for new message
You would only receive the notification if you’re logged in to your Handle account and you are in the “Messages” section of your dashboard. The default setting is “On”, as seen below.
If you don’t want to receive a sound notification for every new message, simply turn off the switch (if the switch is white, then the sound notification is off).
After your made the change, please click on the “Save” button at the bottom of the page to save this change.

Option 16: Hide quick reply options
You can choose to hide the quick reply options once a user chooses one quick reply option. After user clicks on one of the quick-reply options, the rest of the quick-reply options will not be shown anymore. To always have quick reply options visible, please click on the toggle and save your change.

Option 17: Changing messages to end the chat
You can edit messages your users will see when they want to end the chat. If you would like to change these messages, please start typing in the field of the end message you would like to change. When you changed the message, please don’t forget to click the “Save” button at the bottom of the page to save the changes.

Option 18: Changing the feedback messages
After each chat ends, your users can rate their experience and leave feedback. If you would like to change any of these feedback messages, please start typing in the feedback message field you would like to change. When you changed the feedback messages, please don’t forget to click the “Save” button at the bottom of the page to save the changes.
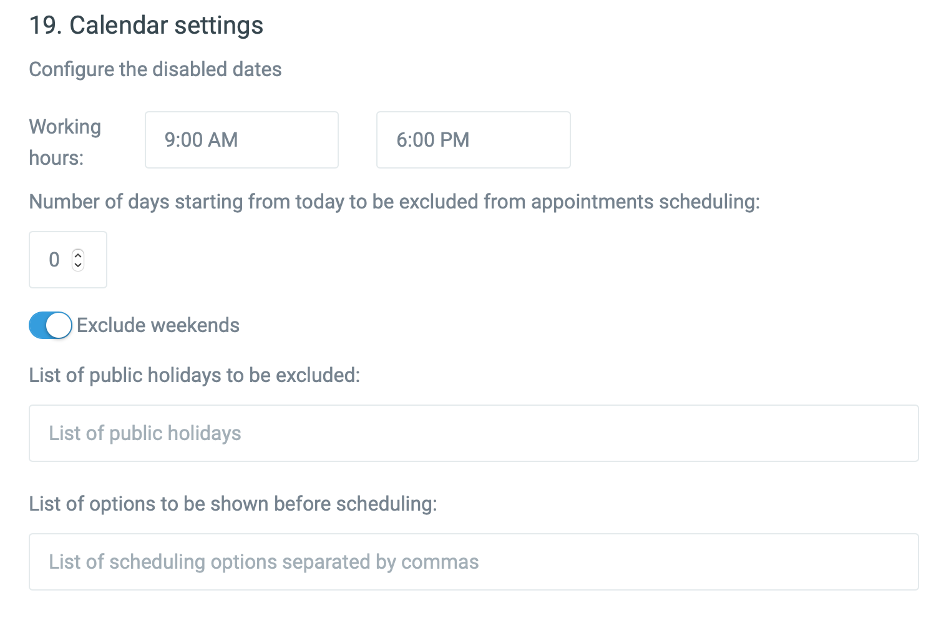
Option 19: Configuring calendar settings
Handle provides a simple-to-use appointment scheduling option in the chat. In the center of the scheduling option is the calendar feature. You can configure several parts in the calendar, such as:
- Working hours – set working hours when you will be available to have appointments with prospects
- Set appointments days – if you don’t want users to be able to schedule appointments on the same day as they engaged with Handle, you can easily exclude days from scheduling. (e.g., if you want to allow same day scheduling, put zero in the field, if you’d like to exclude the same day scheduling, then put 1 in the field, and so on).
- Include/exclude weekends – you have the option to exclude weekends from the calendar so users cannot schedule appointments on the weekend
- Exclude certain dates and holidays – input dates that you would like to block on the calendar and your users won’t be able to schedule appointments on those particular dates
- Options before scheduling – you can add options/buttons that prospects can check before they set the date and time on calendar (e.g., you can put types of properties for prospect to choose from before scheduling a visit, so you know what property type the prospect is interested in).
Please don’t forget to click the “Save” button at the bottom of the page to save the changes.
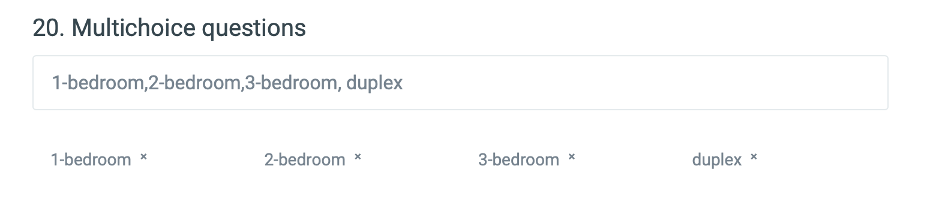
Option 20: Multi-choice options
Multi-choice option allows you to list and showcase your properties, products, services, or anything else in a very user-friendly and simple way. To add and showcase these items, simply write each item in the multi-choice field, and separate every item with a comma. That’s it! Please don’t forget to click the “Save” button on the bottom of the page to save the changes.
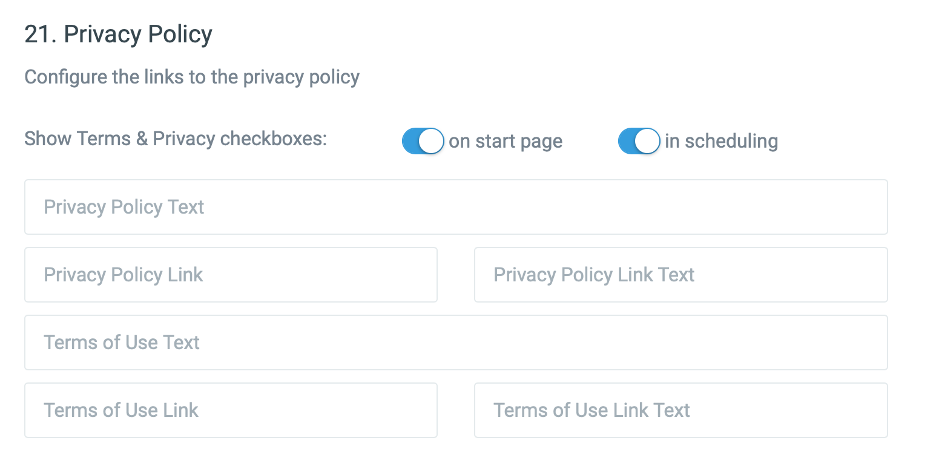
Option 21: Adding and configuring privacy policy
You can easily add and configure privacy policy and terms of use links in the chat box. There are two locations in the chat box where the links can be placed: on the start page, before users engage with Handle and in the scheduling option. Let your users know what you do with their data and guide them to your privacy policies.
To add a privacy policy link on the start page, please click on the toggle next to the “on start page” option and turn it on (it’s on when the toggle is blue). If you’d like to add the privacy link to the scheduling option, please click on the toggle next to the “in scheduling” option and turn it on (it’s on when the toggle is blue).
You can edit the placeholder wording by typing in the policy text field. In the link fields, please put the link to your policy. When you are finished with adding your policies and editing the text in the policies’ fields, please don’t forget to click the “Save” button at the bottom of the page to save the changes.
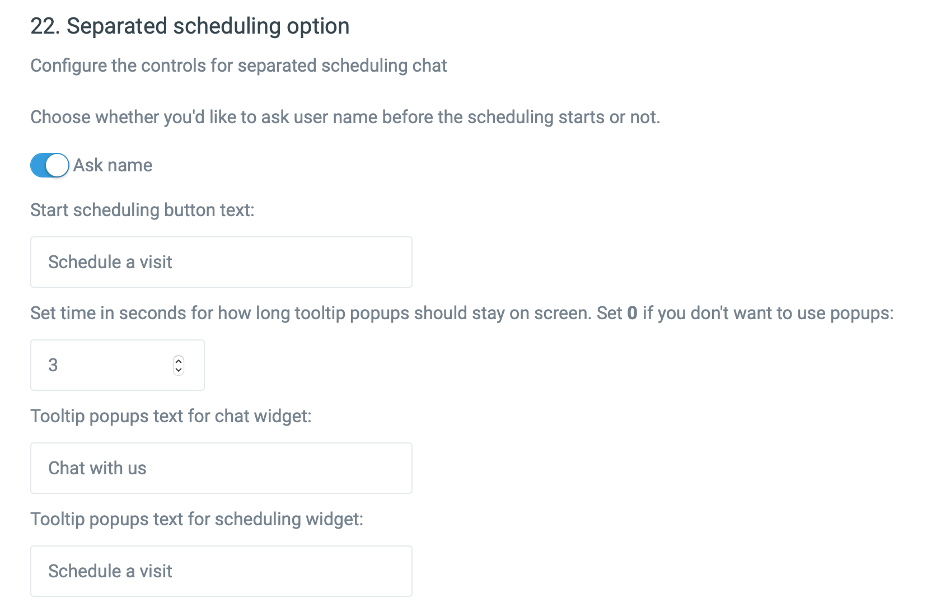
Option 22: Configuring the standalone scheduling option
Standalone scheduling option serves to instantly schedule appointments. You can configure multiple parts in the scheduling options, such as:
- Capture name – before a user schedules an appointment, you can choose to ask the name first. To capture the name before scheduling starts, please click on the toggle next to “Ask name” and turn it on (it’s on when the toggle is blue).
- Edit scheduling placeholder’s text – default text for the scheduling placeholder is “schedule a visit”, you can simply edit it by deleting the text and inputting the text you wish to show in the text field..
- Set the time for pop-up tooltip – tooltip is a message that will show next to the scheduling option. If you don’t want to show the tooltip, set the time to zero. If you would like the tooltip to remain next to the option for a specific time, put the number of seconds you’d like the tooltip to be next to the option (e.g., if you’d like the tooltip to remain seen next to the option for five seconds, put five in the field, and so on).
- Edit the name of tooltip – default name of the tooltip is “Schedule a visit”, you can easily edit the name by inputting the text you wish in the tooltip name field.